0. Introduction
Once you are ready to train a YOLO model, you can launch trackRai by typing the following command in the R console:
This will open the app launcher either in the viewer pane of RStudio and Positron, or in a separate window, depending on your local configuration. In RStudio at least, you can control where the app opens by setting the launch.browser option. For instance:
trackRai(launch.browser = shiny::paneViewer())will launch the app in the RStudio viewer pane.
Once the launcher is running, click on the “Train” button to launch the YOLO training app. The launcher will close and the app will start shortly after. This app will help you train a YOLO11 model using the dataset created in the previous tutorial. The process is straightforward, however, it might take some time depending on the configuration of your system. A machine with an NVIDIA graphics card and the CUDA framework installed is highly recommended.
1. Training module
Once the app opens, you will be presented with the “Training” tab. Click on the “Select training dataset” button and navigate to a folder containing a YOLO dataset as prepared in one of the previous tutorials (it should a folder named “YOLO”). Select this folder.
Then, select a model size. Smaller models take less time and memory to train, larger models may yield better results for complex arrangements of objects. We find that the smaller (“nano”) model size does a really good job in most situations.
Finally, you can “Set the number of training epochs” you would like to run and the “patience” of the training process. This last parameter allows the training to stop automatically if the training performance does not improve after a set number of epochs. This helps prevent overfitting by stopping training when performance plateaus; it also saves computing time. If you do not want training to stop early, set the patience to the maximum number of epochs.
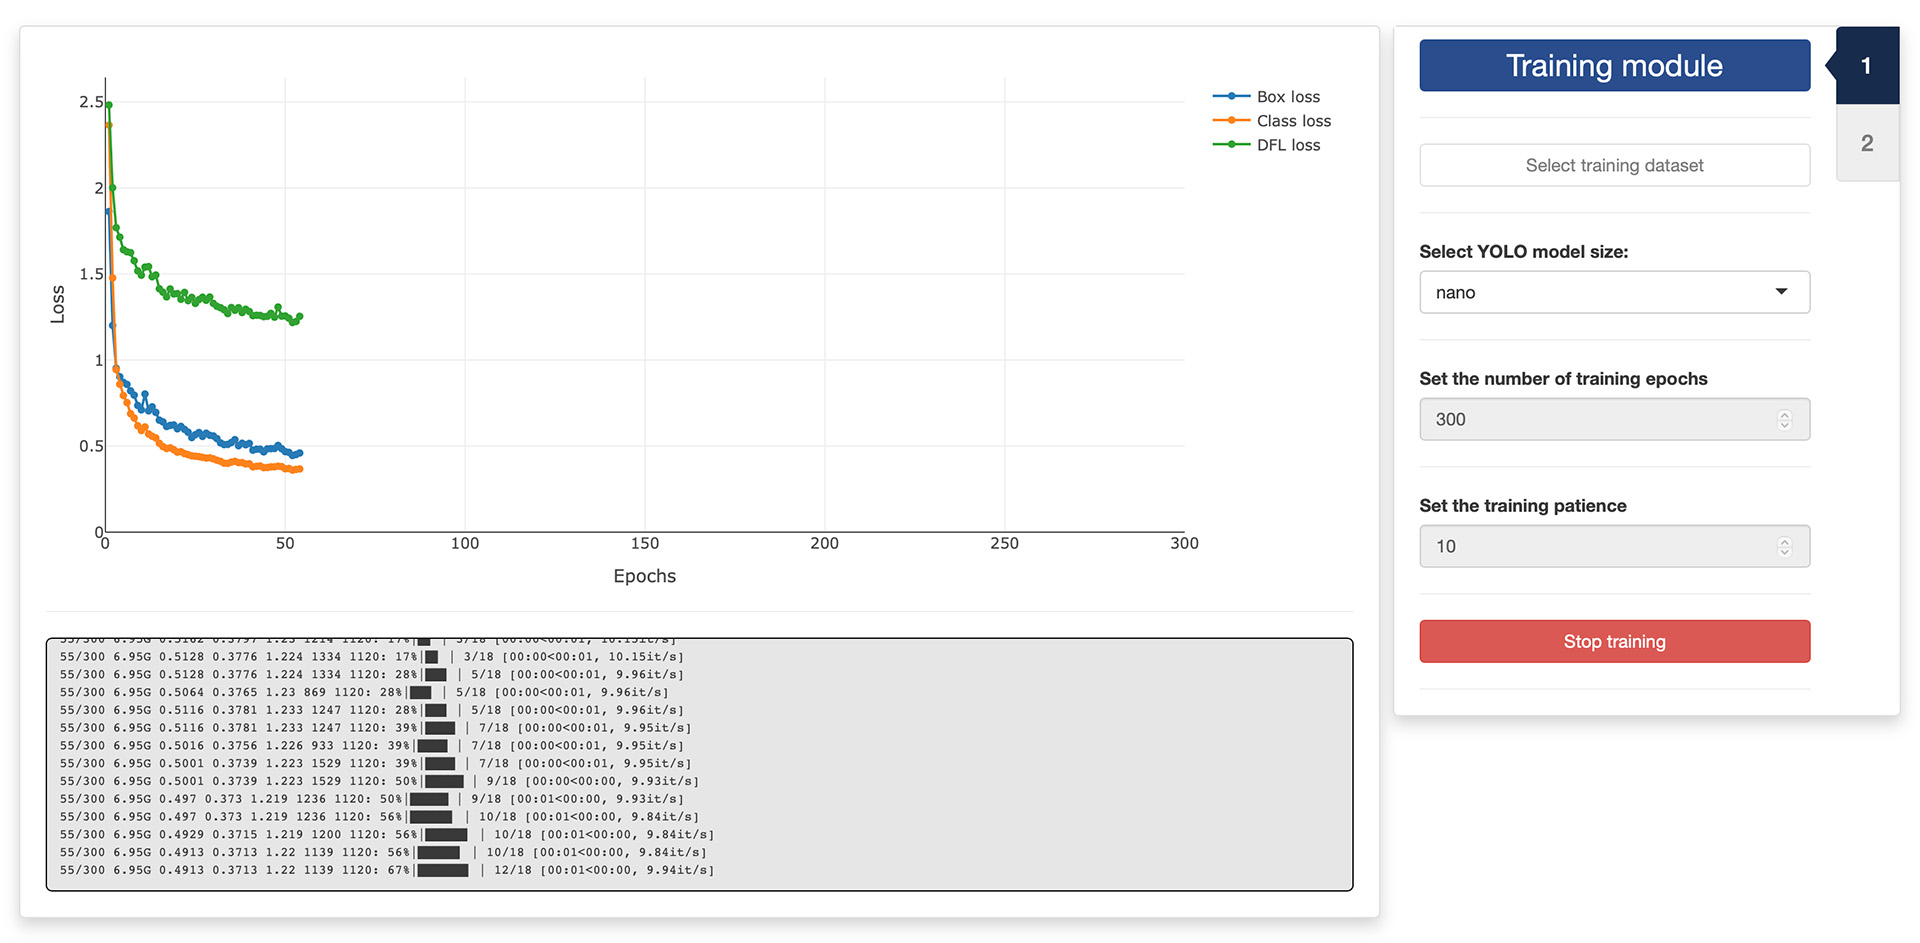
After setting all the training parameters, click the “Start training” button and wait until it completes. Performance metrics will be displayed in the graph on the left of the window, and in the log panel below the graph.
Once the training has completed successfully, the second tab of the app will become available and you can click on it to navigate there.
2. Checking module
In the second tab of the training app, you can check the quality of the training and the effect of the inference parameters on the detection of the objects of interest in a video.
First, you need to select a video by clicking the “Select video” button. You can also select an optional mask by clicking the “Select mask (optional)” button. This will load the video in the app and you navigate through it by sliding the green tab along the timeline displayed below the video. You can also use the arrow keys on your keyboard to navigate through the video: the left and right arrows allow you to navigate frame by frame; the up and down arrows allow you to navigate one second at a time. Detected objects will be automatically enclosed in a colored rectangle and their class will be overlaid on top of them (you can show/hide the boxes and class tags by using the corresponding tick boxes at the bottom of the control panel).
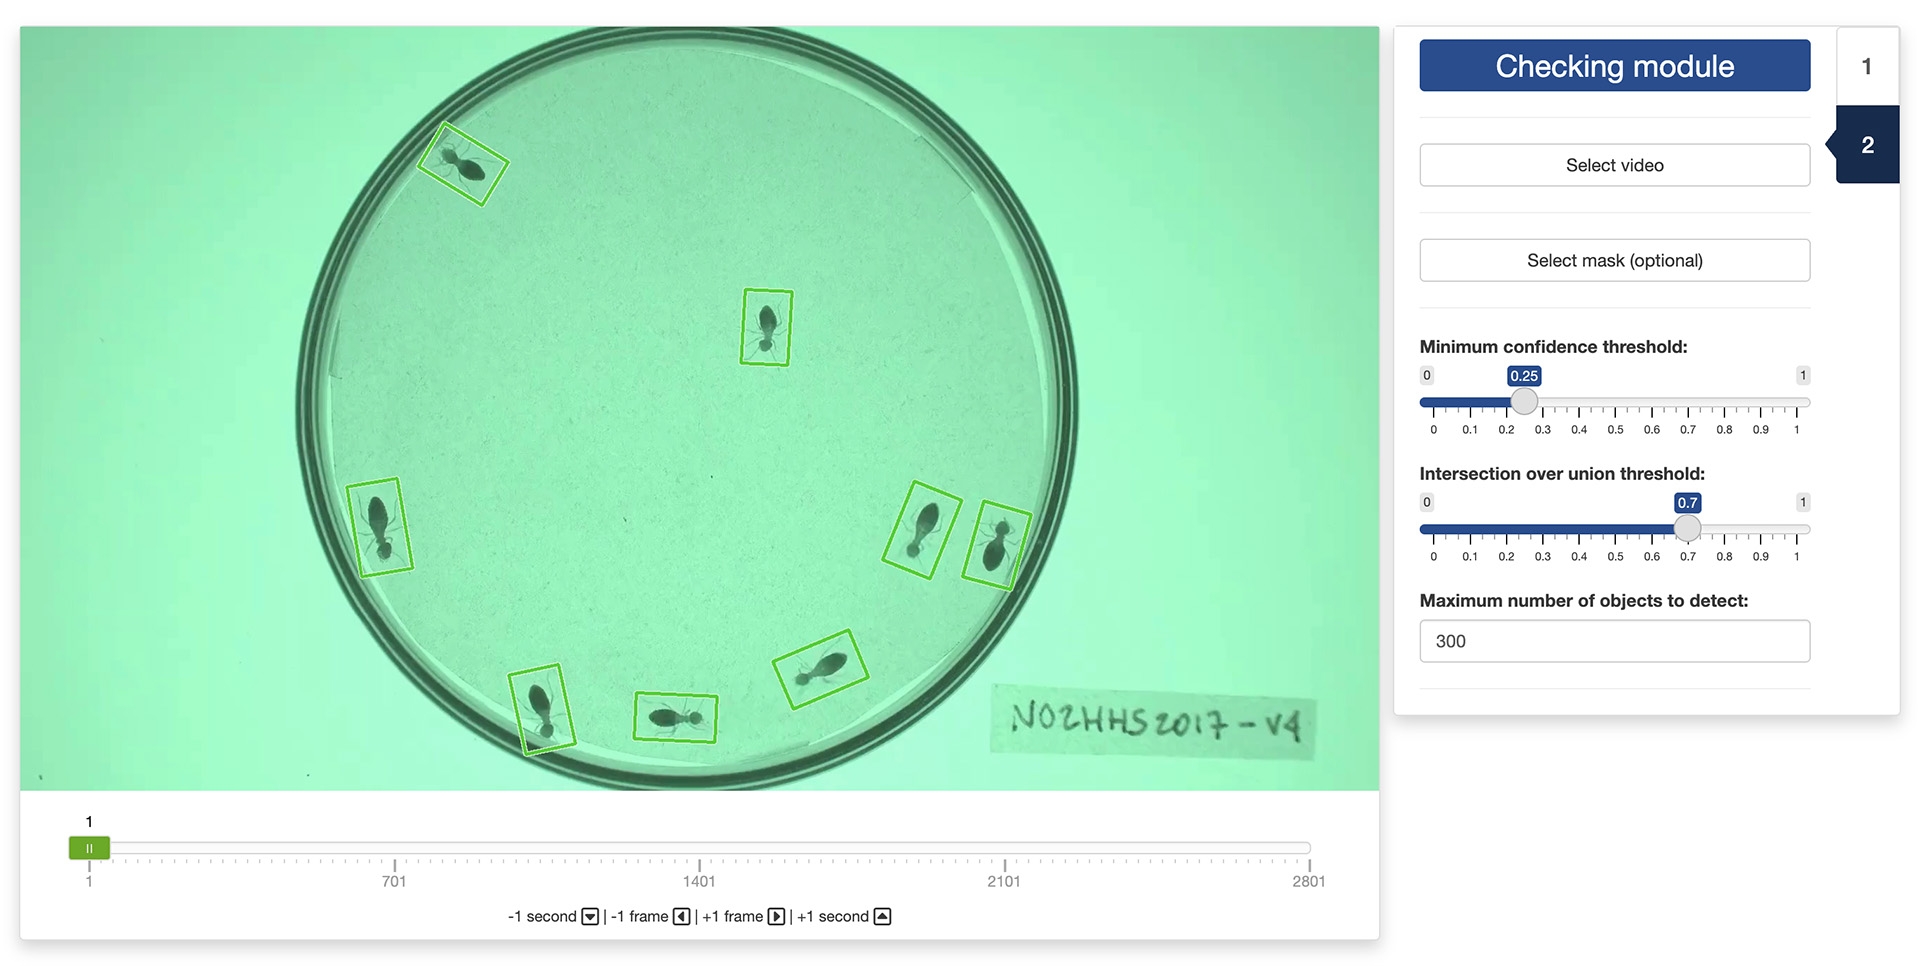
You can check the effect of the following parameters on the quality of the object detection:
- Minimum confidence threshold: the minimum confidence threshold for detection. Objects detected with confidence below this threshold will be disregarded. Adjusting this value can help reduce false positives.
- Intersection over union threshold: threshold for non-maximum suppression. Lower values result in fewer detection by eliminating overlapping boxes, which can be useful for reducing duplicates.
- Maximum number of objects to detect: Maximum number of detection allowed per frame. Limits the total number of objects the model can detect in a single inference, preventing excessive outputs in dense scenes.
If you are not satisfied with the detection results, you can return to the first tab and increase the number of training epochs and/or the patience of the training, or select a larger model size, before running another round of training.
If you are satisfied with the results, you are done and you can close the app. The next step will be using the trained model to track objects in a video.
The video used throughout this tutorial was provided by Sridhar, V. H., Roche, D. G., and Gingins, S. (2019). Tracktor: Image-based automated tracking of animal movement and behaviour. Methods Ecol. Evol. 10, 691. doi:10.1111/2041-210X.13166 and used here with permission of the authors.